If you’re here, chances are you’ve got an MV Motor (that’s medium-voltage, not just “motors that are kind of medium-sized”) show up at your worksite, and you’re staring at a crate wondering if you’re gonna hook that thing up right. I get it—we’ve been supplying MV Motors for over a decade now, and the number of times I’ve heard someone say “wait, I thought I just bolted it to the floor and flipped a switch” is way too high. Installing an MV motor isn’t like plugging in a space heater, and skip the “winging it” step. Mess this up, and you’re looking at a fried motor, downed production, and a bill that’ll make you kick yourself for not reading the manual. Let’s break this down step by step, no fancy jargon, just what we actually tell our customers when they call at 2 a.m. with an emergency. MV Motor
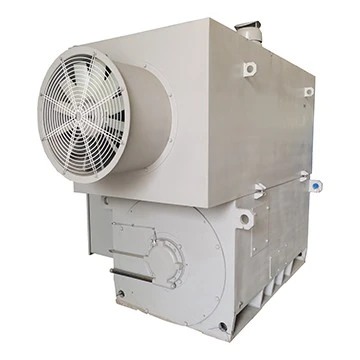
First things first: unboxing and pre-install checks. I know, everyone skips this part because the crate looks sturdy, but trust me—don’t. Last quarter, a customer of ours missed a tiny dent in the motor’s terminal box during unboxing, and that dent caused a partial discharge that made the whole thing go up in smoke two weeks later. Here’s what you gotta do: when you open the crate, don’t drag the motor out by the leads or the cooling fins. Those are fragile, even if they look thick. Use a forklift or a crane with soft slings—never chain slings, they can cut into the motor casing. Once it’s out, do a visual check all over: look for dents, cracked insulators, loose bolts on the base, and make sure the nameplate matches what you ordered. Wait, the nameplate—don’t ignore that. It has voltage, phase, RPM, insulation class, and the all-important grounding specs. If the voltage on the motor is 4160V and your line is 4800V, that’s a no-go. Call us before you even think about moving forward—we can swap it out faster than you can troubleshoot a miswired power line.
Next, site prep and mounting. The motor’s gonna be running, so it needs a solid base—no shaky concrete, no loose bolts under the feet. I’ve seen people mount these on old steel frames that bounce every time a forklift drives by, and that vibration is a killer for MV motors over time. The base should be flat, level, and have enough clearance around it for ventilation—MV motors generate a lot of heat, and if the intake vents are blocked by a pile of pallets, your motor’s gonna overheat and die early. Pro tip: leave at least 3 feet of space on the sides and top, more if it’s a big motor. When you mount it, use shims under the feet to get it perfectly level—uneven mounting causes shaft misalignment, and that’s the #1 reason for motor failures we see. Don’t use extra shims to “prop it up”—get the level right, or you’ll be replacing bearings way sooner than you should.
Now, alignment. This is where most people mess up, hard. Shaft alignment between the motor and the load (pump, gearbox, conveyor) is non-negotiable. There are two types you’ll hear about: rigid and flexible. Unless you’re a specialist, go with flexible coupling alignment—rigid is only for specific setups, and it’s easy to mess up. You’ll need a dial indicator for this, no guessing. The goal is to have the motor shaft and load shaft perfectly in line, with no angular or parallel misalignment. If you skip this, even a tiny misalignment will cause excessive vibration, wear on bearings, and eventually break the shaft. We’ve had customers tell us they aligned it “good enough” and within 6 months they were replacing both the motor and the pump—total waste of money and downtime. Spend the 30 extra minutes to get it right.
Wiring is the next big step, and this is where safety can’t be stressed enough. MV motors run on high voltage, so never work on the power lines unless the main breaker is locked out and tagged. No exceptions—last year, a tech we know didn’t lock out the breaker and got a 4160V shock that landed him in the hospital for a week. Don’t be that guy. First, check the terminal box inside the motor: make sure the leads are clean, no frayed insulation, and the connections are tight. The nameplate will tell you how to wire it—star or delta? Follow that exactly. Then, you need proper grounding. MV motors need a dedicated ground wire, not just the equipment ground. The grounding conductor should be sized specifically for your motor’s current—don’t just grab a random wire. Also, use proper insulation for the voltage you’re working with. Low-voltage wire won’t hold up to MV, and that’s a fire hazard. If you’re not comfortable with wiring, hire a licensed electrician who’s worked with medium-voltage equipment—we won’t judge you for not being an expert, and it’s way better than risking injury or a fire.
After wiring, check the cooling system. Most MV motors have a fan on the back to blow air over the casing, or sometimes they’re liquid-cooled. For air-cooled, make sure the fan is spinning in the right direction (it should blow air away from the motor, not into it) and the guard around it is secure—no loose pieces that can get sucked into the fan. If it’s liquid-cooled, check the hoses for leaks, make sure the coolant level is correct, and the hoses aren’t kinked. A clogged cooling system is one of the quickest ways to overheat a motor, so don’t skip this.
Now, pre-start testing. This is the step that saves you from frying a brand new motor. Don’t just flip the switch—test everything first. First, do a megger test on the motor windings. The megger checks the insulation resistance, so you know there’s no dirt or moisture in the windings that would cause a short. The reading should be at least 1 megohm per 1000V of the motor’s voltage—so a 4160V motor should have a 4 megohm reading, minimum. If it’s lower, you need to dry out the windings before starting—either with a heating pad or running low voltage for a few hours. Next, test the grounding: use a multimeter to make sure the ground wire is connected properly, and there’s continuity between the motor casing and the ground rod. Then, do a rotational direction test. Before connecting the full voltage, apply a low voltage (like 10% of the rated voltage) and spin the motor for a second. Check if it’s spinning in the right direction—if it’s going the wrong way, just swap two of the power leads. Easy fix, no need to tear anything apart later.
Once all that checks out, you can do a no-load test. Disconnect the load, start the motor, and let it run for 30 minutes. Watch for vibration, unusual noise (grinding, humming, squealing), or overheating—you can check the casing temperature with your hand (it should be warm, not hot enough to burn you). If everything feels good, shut it down, connect the load, and you’re almost there. Wait, no—after connecting the load, do a load test. Run the motor under load for an hour, check the current draw against the nameplate, make sure it’s not pulling more amps than it should, and watch for any issues. If all that works, you’re good to go.
Now, let’s talk common mistakes we see all the time. First, skipping the pre-install checks—we’ve had motors arrive with broken windings because the shipping company dropped them, and the customer didn’t check before installing. Second, bad alignment—like I said, that’s the top cause of failures. Third, wrong wiring—people mix up star and delta, or use the wrong ground wire, and that ruins the motor fast. Fourth, no lockout-tagout during wiring—safety isn’t optional here. And finally, not testing before starting—if you skip the megger test, you might have moisture in the windings that will short out when you apply full power.
Look, we’re MV motor suppliers, not just a company that boxes up motors and ships them. We work with small factories and big plants all over, and we know that a bad install costs you time and money. If you’re in the middle of this and something feels off, don’t keep going—call us. We can walk you through whatever step you’re stuck on, or even send a tech out if you need it. We don’t want you to have to deal with a downed line or a broken motor because you skipped a step.

Installing an MV motor doesn’t have to be scary, but it does need to be methodical. No rushing, no cutting corners, no ignoring the small stuff. Do the unboxing check, prep the site right, align the shafts, wire safely, test everything before hitting the switch. That’s how you get your motor running smooth and keep it running for years. If you’re looking to get a new MV motor, or you have questions about installing the one you already have, reach out to us—we’re here to help make sure it goes right.
MV Motor References
- National Electrical Manufacturers Association (NEMA) Standards for Medium-Voltage Motors, Installation and Maintenance
- International Electrotechnical Commission (IEC) 60034: Rotating Electrical Machines – Rating and Performance
- Occupational Safety and Health Administration (OSHA) Guidelines for Working on Medium-Voltage Electrical Equipment
Xian Putai Electric Motor Equipment Co., Ltd.
Xian Putai Electric Motor Equipment Co., Ltd. is one of the most professional mv motor manufacturers and suppliers in China, also supports customized service with low price. Welcome to buy advanced mv motor in stock here from our factory. If you have any enquiry about quotation, please feel free to email us.
Address: Haibo Guangchang Fengcheng Nine Road Economical & Technological Development District Xi’an City Shaanxi Province – China
E-mail: sales@putaimotor.com
WebSite: https://www.putaimotor.com/
